 In this tutorial, we will show you how to create a lush and vibrant "Middle-Earth" inspired landscape in Photoshop. Let's get started!
Tutorial Assets
The following assets were used during the production of this tutorial.
Step 1
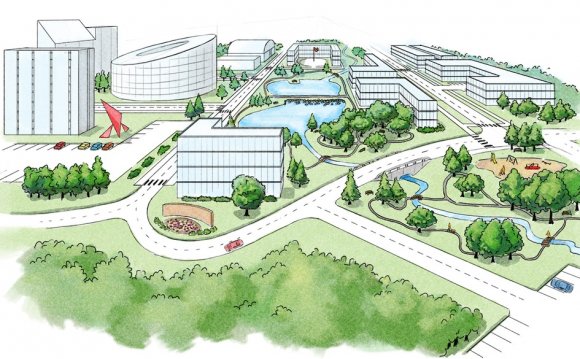
After collecting a bunch of references (screen grabs from Peter Jackson's "The Hobbit" Official Trailer), I take a good look at the way the lighting works, the detail of the rocks, mountains, trees and the overall atmosphere of the environment.
I roughly jot down my landscape idea in a New Document (File > New...) with the dimensions set at a good, wide Landscape format (7000 x 3138 pixels) and a dpi of 300. Using some various elements from the references I have collected, this is literally the first thing that pops into my mind, and only takes about 30-40 seconds. A very rough and quick scribble to get the idea down!
Step 2
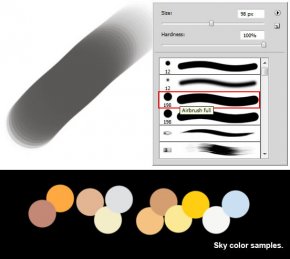
Then on a New Layer, I refine that scribble a bit more until I can see more clearly what I want. As with many Landscape/Environment paintings, I intend this piece to have some very distinct planes that will bring in a strong sense of depth; Background, Middleground and Foreground.
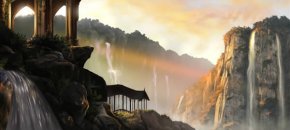
 Next, I block in the base colors with the Paint Brush Tool (B) set using the Hard Round Airbrush (or Airbrush Full). For the Sky, I take some samples from the references I have gathered, which I find show a lovely mix of pale blues, yellows and orange.
I rough in the color of the sky first as my core background layer. I'm not being too fussy with the details at the moment. I am happy with just a rough example of the clouds and color to fill in the empty white space for now.
At this stage, I also want to have a good idea where my main light source is going to be for later reference. For this, I am thinking of having it come from the upper left corner, so it will catch on the middleground mountain on the right hand side the most.
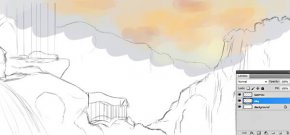
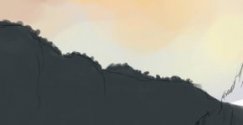
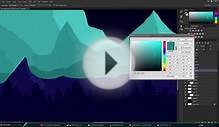
When I'm roughing in a composition like this which has differing planes (Background, Middleground, Foreground), I like to block it in from the layers sitting the most furthest away first. Here, I have painted in the mountains in the background to start with on their own seperate Layer.
Step 3
I try not to do the edges along the top too smooth- I want them to represent the tops of the trees in the distance!
Step 4
Next comes the Middle Ground layer. This part will be slightly clearer and defined later on. I paint it in a couple of shades darker (#1d1e20) so it doesn't get mixed up with the mountain layer behind it, and begins to stand out a little more!
Step 5
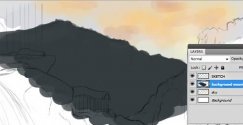
 And finally fill in the Foreground layer an almost black (#0f100b). This layer is going to be the darkest, the most detailed and defined of all the three ground planes!
Step 6
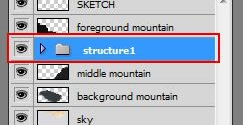
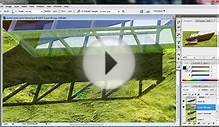
For the buildings on top of the Foreground mountain, I create a New Group in my Layers Window (by clicking the little Group icon on the bottom of the Layers Window), and title it "Structure 1". This is where I will keep and organize all my layers regarding that particular section.
Step 7
I block in the first pillars of the structure on one layer with the hard edged Paint Brush (B).
Step 8
Then the rest that is sitting behind on another Layer underneath.
Step 9
I also painted in the last bit of sky showing through with the rest of the Background mountain layer too.
Step 10
And finally, I block in the Waterfall on a layer above the Foreground mountain. These are all my major layers I will be working with throughout this painting!
While I'm on that layer, I start adding some quick shading into the waterfall- starting with the darker tones. I will add in the highlights and detail it more thoroughly later on. I also erase away some edges to shape up the waterfall a bit more.
I move back onto the Foreground mountain Layer, and Select All (Command/Ctrl+ Click on that layer in the Layers Window to select everything on it) and paint in some tones; starting with the darker shades to distinguish the rocks and shapes. I focus quite a bit of attention here first as it is quite the centerpiece of the composition, and will hold the sharpest detail and texture later on!
I add some little orange highlights as I go to get the shine off the damp rocks and sunlight, and some darker shadows to start defining the different layers of rock surfaces even more. It's also a good idea to toggle the Sketch Layer on and off just to see where the painting is at too!
I paint in some of the bushes and shrubs a dark green color (#20261a) which starts to break up the solid grays and rock a little more.
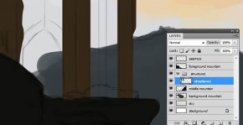
Now I fill in the second little building (just like the previous one) in its own Layer Group (titled "Structure 2"). This one is basically silhouetted against the back light, so it won't be needing too much detail at the moment. Just the basic shape placement is fine for now.
Once I have put in a nice amount of shading and highlighting in the Foreground, I move back onto the Middleground mountain. I start by painting in a lighter color on the rock face- keeping in mind which way my light source is originating from (top left).
I make a New Layer and start painting in a lighter tone overall to knock the mountain further into the background and make if fade back from the foreground even more.
I switch my brush to the Textured Round Brush (from the `Rahll Brush Set), and begin detailing with little highlights to define the edges on the rock face where the light catches.
I also use that brush to begin adding in more shadows, also filling in the treetops along the edge as I go.
Now to add the Waterfalls! On a New Layer, I keep using the Textured Round Brush, but set it on a much lower Opacity (around 20%) and just gradually build it up from top to bottom to capture that misty water, as opposed to a straight stream- especially as it begins to dissipate and fade out towards the bottom.
YOU MIGHT ALSO LIKE
Share this Post
latest post
-
 Landscape Design articles February 3, 2017
 -
 House Garden Landscape Design January 26, 2016
 -
 Waterfall Landscape Design January 4, 2017
 -
 Modern Landscaping Design December 24, 2015
 -
 Landscaping Garden Design June 13, 2016
 -
 Hospital Landscape Design July 11, 2018
 -
 Landscape Design Program for Mac April 7, 2017
 -
 Landscape Design New York December 4, 2017
 -
 Adelaide Landscape Designers March 5, 2017